Getting Started with PageMaker
Welcome to the PageMaker documentation! PageMaker is an AI-driven application designed to automatically generate web page code from design sketches. This guide will help you understand the core features of PageMaker and how to get started using it.
Introduction to PageMaker
PageMaker simplifies the process of turning design sketches into functional web pages. Whether you are a developer or a designer, PageMaker can help streamline your workflow by generating HTML, CSS, and JavaScript code based on your design inputs.
By using PageMaker, you can quickly transform static designs into interactive, responsive web pages without needing extensive coding knowledge. This makes it an ideal tool for designers who want to see their visions come to life, as well as for developers who want to speed up the initial stages of web development.
Main Features
Left Menu Options
The left sidebar contains various menus and options that allow you to configure settings, manage sketches, and customize your web page's framework and components. Here's a detailed look at each option:
More Dropdown Menu
- Settings:
- This option lets you configure large language model (LLM) parameters, which are crucial for the AI's performance. You can set the
model name,apiKey, andbaseURL. - model name: Specify the name of the AI model you are using. This could be a general-purpose model or one fine-tuned for specific tasks.
- apiKey: Enter your API key here. This key is used to authenticate your requests to the AI service.
- baseURL: Set the base URL for the AI service. This is typically the endpoint where the AI model is hosted.
- This option lets you configure large language model (LLM) parameters, which are crucial for the AI's performance. You can set the
The API key is only stored locally on your computer for security reasons.
Sketch Dropdown Menu
- Open sketch:
- Use this option to open a web design image from your local computer. This image serves as the blueprint for the web page you want to create.
- Open sketch URL:
- This option allows you to load a web design image from the internet. Simply provide the URL of the image.
- Draw sketch:
- If you prefer to create a design from scratch, you can manually draw a web design sketch using this option.
- New page:
- Start creating a new web page. This will clear any existing sketches and settings, giving you a fresh canvas to work on.
- Open page:
- Open an existing saved web page. This is useful for continuing work on a previously started project.
- Save page:
- Save the current web page, including all sketches and settings. This ensures you can come back to your project later without losing any progress.
JS: Select JavaScript Framework
- Choose between popular JavaScript frameworks for your project:
- React: A library for building user interfaces, particularly single-page applications.
- Vue: A progressive framework for building user interfaces, which is also suitable for single-page applications.
- Svelte: A new way to build web applications. It's a compiler that takes your declarative components and converts them into efficient JavaScript that surgically updates the DOM.
CSS: Select CSS Framework
- Select a CSS framework to style your web page:
- Tailwind CSS: A utility-first CSS framework for rapid UI development.
UI: Select UI Framework
- Choose a UI framework to provide pre-built components and styling:
- Ant Design: A UI design language and React-based implementation with a set of high-quality components.
- Arco Design: A comprehensive solution for creating modern, stylish user interfaces.
- Semi Design: A UI library with a focus on modern design principles and high usability.
- Bootstrap: The most popular HTML, CSS, and JS library for developing responsive, mobile-first projects on the web.
- Ionic: A complete open-source SDK for hybrid mobile app development.
CUS: Add Custom Components
- This option allows you to manually add custom components that you have developed. These components can be used in your web page alongside the pre-built components from the selected UI framework.
TS: Enable/Disable TypeScript
- Choose whether to use TypeScript, a statically typed superset of JavaScript, in your project. Using TypeScript can help catch errors early and improve code quality.
Main Panel Buttons
These buttons allow you to show or hide different panels in the workspace:
- Sketch: Show or hide the Sketch panel, where you manage your design sketches.
- Code Editor: Show or hide the Code editor panel, where the generated code is displayed and can be edited.
- Webpage: Show or hide the Webpage preview panel, where you can see a live preview of your web page.
Sketch Panel Features
The Sketch panel is where you manage your design sketches. It includes the following features:
- Add Design Sketches:
- You can add multiple design images to the Sketch panel. These images serve as the basis for the web page you want to create. You can import sketches from your local computer or from a URL.
- Add Comments and Annotations:
- Enhance your design images by adding comments, annotations, and descriptions. This helps provide context and clarity for each design element, making it easier for the AI to understand and convert into code.
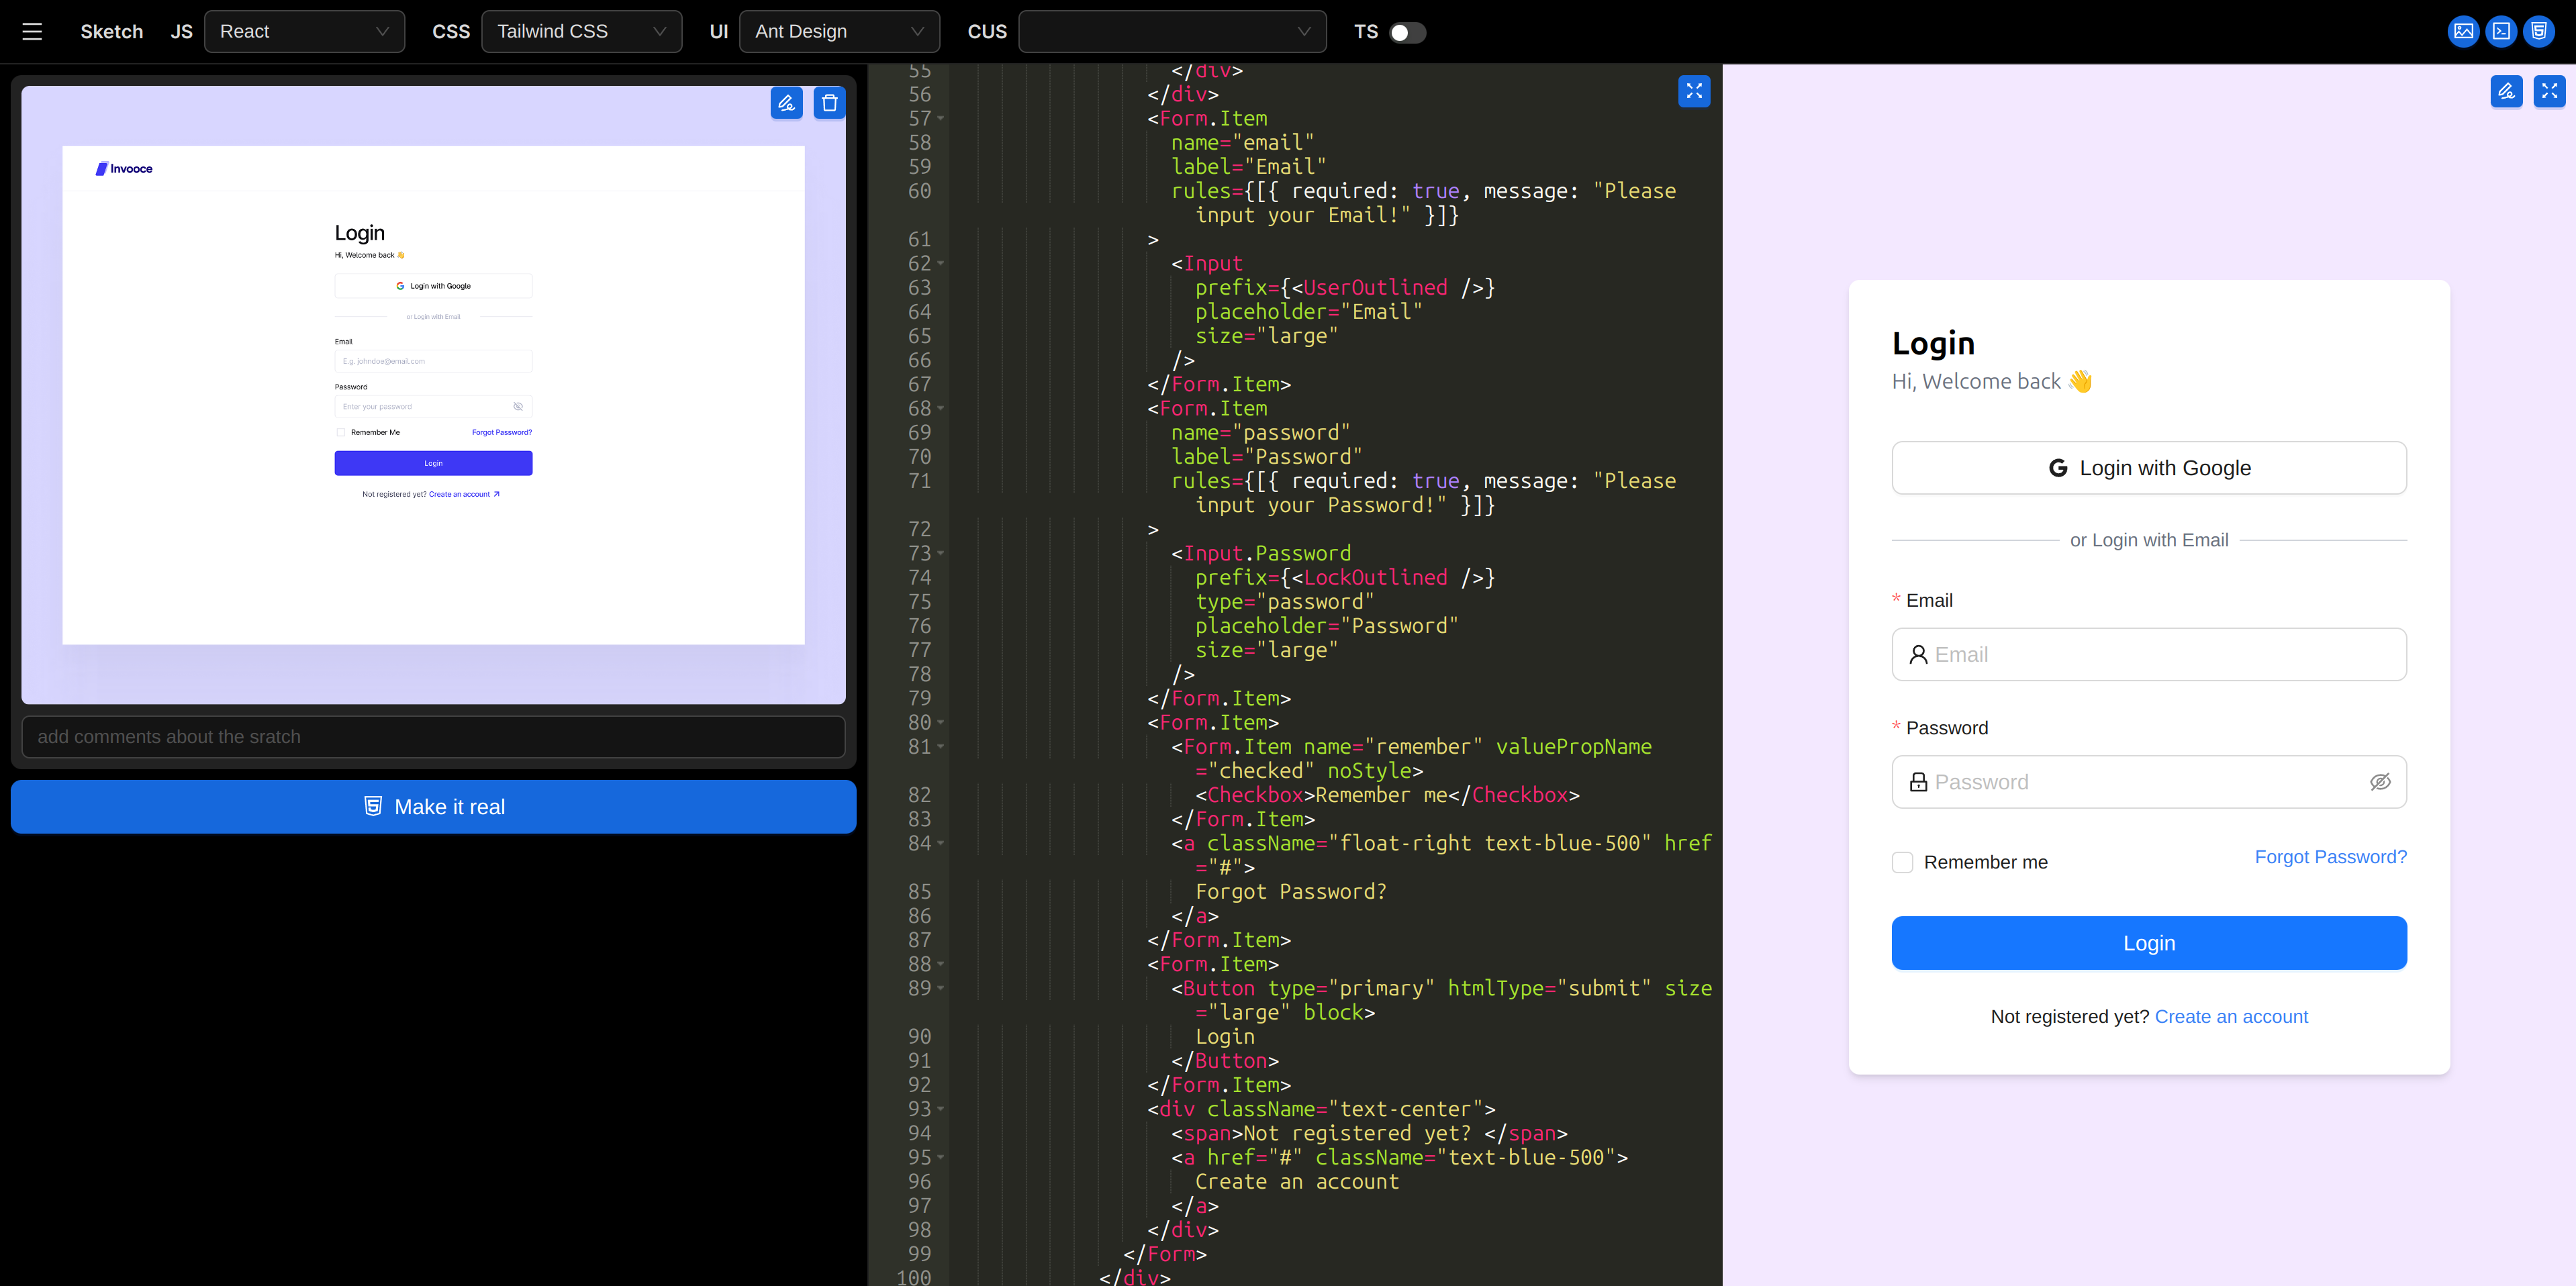
- Make it Real:
- This is the core feature of PageMaker. By clicking the "Make it Real" button, PageMaker will analyze the design sketches and settings, using AI to generate the corresponding web page code. The generated code will be displayed in the Code editor panel, and a live preview of the webpage will be shown in the Webpage preview panel.
Code Editor Panel Features
The Code editor panel is where you can view and edit the generated code. It includes the following features:
- Display AI-Generated Code:
- The code generated by the AI is displayed in this panel. You can review the code to see how your design has been translated into HTML, CSS, and JavaScript.
- Manual Code Editing:
- While the AI does the heavy lifting, you can make manual adjustments to the code to fine-tune the functionality and appearance of your web page.
Webpage Preview Panel Features
The Webpage preview panel provides a real-time preview of your web page. It includes the following features:
- Real-Time Preview:
- As you make changes to the design sketches or code, the Webpage preview panel updates in real-time to reflect those changes. This allows you to see how your web page will look and behave without needing to constantly refresh or reload the page.
Getting Started
Now that you're familiar with the main features of PageMaker, let's walk through the steps to get started:
Step 1: Configure LLM Settings
Before you can start generating web pages, you need to configure the LLM settings:
- Model Name: Specify the name of the AI model you are using.
- API Key: Enter your API key to authenticate your requests to the AI service. Remember, the API key is stored locally on your computer for security reasons.
- Base URL: Set the base URL for the AI service.
These settings ensure that PageMaker can effectively communicate with the AI model to generate the web page code.
Step 2: Add Design Sketches
Next, add your design sketches to the Sketch panel:
- Open Sketch: Upload a design image from your local computer.
- Open Sketch URL: Load a design image from a URL.
- Draw Sketch: Manually create a design sketch.
You can add multiple design images, providing a comprehensive view of the web page you want to create. Add comments and annotations to each design image to give the AI more context and clarity.
Step 3: Set Optional Configurations
While not mandatory, setting your preferred configurations for JavaScript, CSS, UI, custom components, and TypeScript can help tailor the generated code to your specific needs:
- JS Framework: Choose between React and Vue.
- CSS Framework: Select Tailwind CSS for styling.
- UI Framework: Pick from Ant Design, Arco Design, Semi Design, Bootstrap, or Ionic.
- Custom Components: Add any custom components you have developed.
- TypeScript: Decide whether to use TypeScript.
These settings can be adjusted based on your project requirements.
Step 4: Generate the Webpage
With your sketches and configurations in place, click the Make it Real button. PageMaker will analyze your design sketches and settings, using AI to generate the web page code. The generated code will appear in the Code editor panel, and a real-time preview of the web page will be displayed in the Webpage preview panel.
Step 5: Save Your Webpage
Once you are satisfied with the generated web page, save your work:
- Click Sketch > Save page to save the current web page, including all sketches and settings. This ensures you can return to your project later without losing any progress.
Conclusion
PageMaker makes it easy to transform your design sketches into functional, responsive web pages. By following these steps, you can leverage the power of AI to streamline your web development process, regardless of your coding expertise. Happy coding!